My Sneakeasy Construction Notes
Back to Sneakeasy Page
| June 20, 1999: Launch Day! Sneakeasy exceeded my expectations in just about
every way! She is indeed fast and fuel efficient - I was astounded at how fast
she went with my 8 hp, with 2 adults and 2 youths aboard. With John Wilcock's 15
Johnson she had all the speed I would want. The hull pounded far less than I
expected in the light chop and powerboat wakes - it is indeed narrow enough up
front to cut the waves, and just full enough to lift well. Bolger got
it just right! (surprise, surprise).
For the first launch, she has no windshield yet, or the cockpit coaming.
I was a little nervous about whether the added strength of the coaming
was necessary, but she seemed plenty stiff without it.
It took forever to wrap things up and get her out of the garage and on the trailer,
but with John Wilcock and Harry James' help we finally got there.
Meanwhile, at the launch ramp, Bruce sailed his Weekend Skiff, and Norma Sands
and Russel Strandtmann launched their Pete Culler Bateau and Norma's
10 century replica Viking rowboat.
|

June 20, 1999. Backing away from the dock for the first trip, Timothy
James riding shotgun in the forward cockpit. |
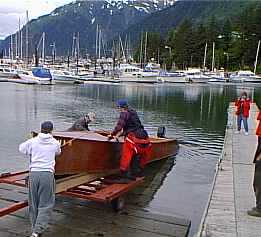
The launch moment, as Herman Savikko gives her a big shove. |
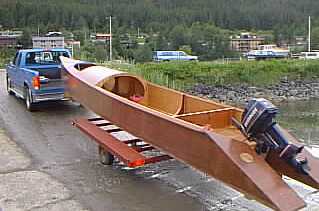
On the ramp, with the 8 horse mounted. |
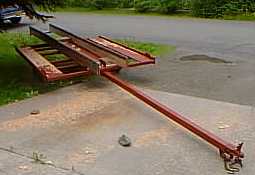
The extended trailer, with long bunks. |
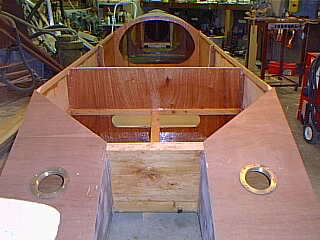
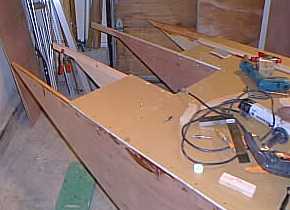
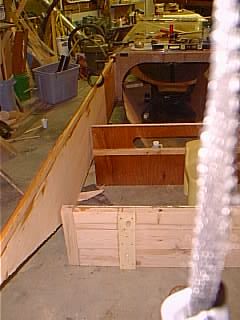
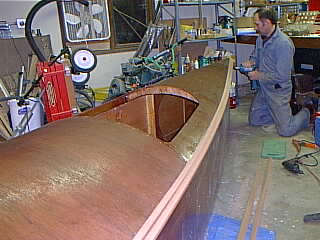
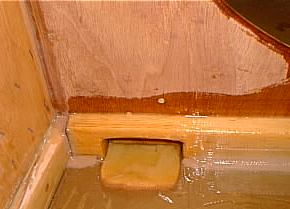
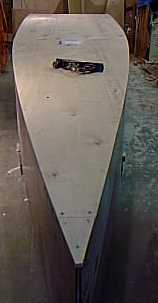
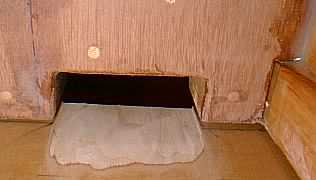
June 14, 1999: Rough in tail tops, salvaged 4 in. deck plates from Endeavour come in handy!
Slop well framed in. |
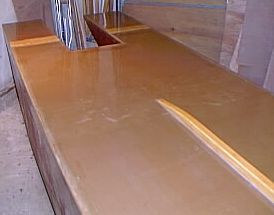
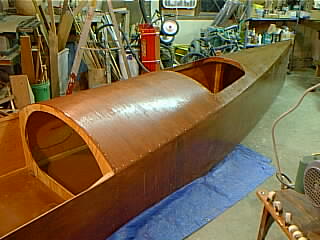
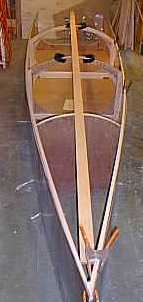
May 30, 1999: Tails and bottom completed and glassed, keel added. Ready to roll (last time!)
|
|
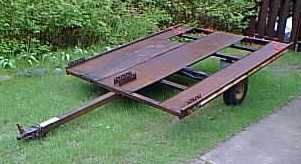
May 24: Yarded an old snowmobile trailer out of the bushes at friend's. Looks usable - need to extend tongue & build bunks. |
May 26:Added draketail insides, aft bottom panel (5/25) |
May 15: Upside down again for adding last 8 feet w/draketails. |
May 23: Joe (8) fastens the transom home. He was amazingly skilled at this! |
May 3: Fastening the guards home |

Foredeck beams laid up from split foam pipe insulation, shown here before adding 2 layers of 8 oz cloth (this is all done upside down). |
May 2, 1999: Prime coat of epoxy on decks.
Now have enough room for boat to sit diagonally in garage,
so can add final 8 feet to stern. |
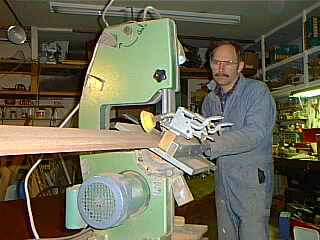
May 3: Milling out the 2 piece guards |
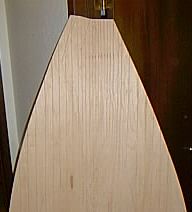
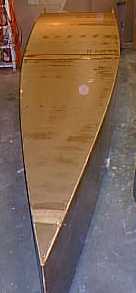
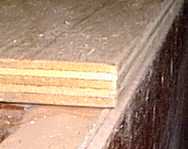
April 27: The deck radius near the bow is really tight! Trials with the 1/4"- luan would not
even come close to bending the radius without snapping, even with steaming.
Lots of relieving grooves cut about 1/2 way thru did the trick. Looks like a laid deck from the underside! |
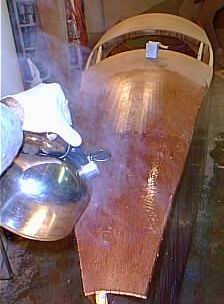
Soaked panels in hot shower to help limber up, then kept hot with boiling water.
No problem making the bends. Can just barely see sharp spots at grooves. |
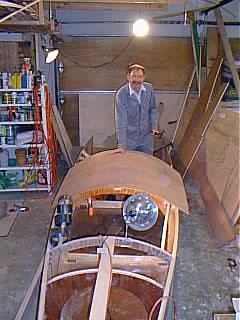
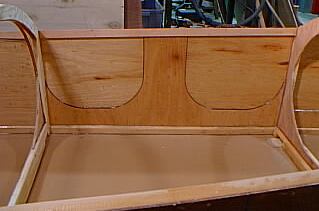
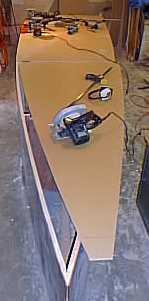
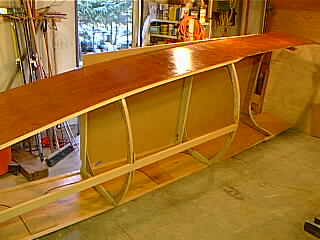
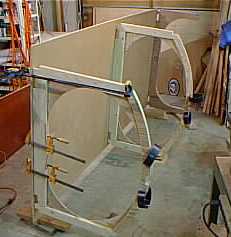
April 16-19: Framed forward cockpit with intermediate deck beam and carlines,
faired bevel on sheer clamp, faired stem for iron, and glued down first deck section with polyurethane/bronze ringnails.
My experiments vindicated by recent Bolgerlist posts, I've resolved to use
the PL Premium caulk with abandon - its fast!!! VERY good working properties for
this type of application.
|
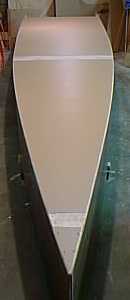
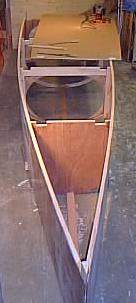
April 21: Rolled on side (can just barely do it by myself at this stage)
to install stem iron (brass half-inch halfround stock)
to wrap around chin of stem onto bottom for about 6" and installed bow eye, before decking over.
Trimmed, filled and faired aft deck section. Deck installation around those curves so far has been
easier than I thought. Looks very fair, except for a small bauble around the aft
section of sheer clamp where I didn't get the sheer clamp bevel just right, but that's very minor.
|
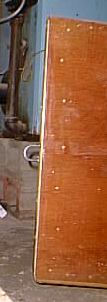
April 15: Filleted bulkhead #8 (location of bottom butt splice),
and glassed short Payson butt splice under the large limber holes where the
upper surface of the bottom panel joint was bare (visible as dark stripe under limber hole,
now covered by 2 layers of 8 oz cloth.
|
Butt splices arc into doubled up sides near & below the waterline.
I'm using luan, so a little more beef here seems appropriate.
|
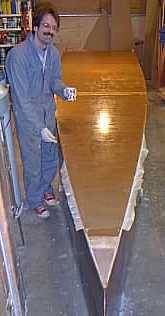
April 6: Bruce Simonson stops by to help glass the bottom and chines.
Bruce is wetting down the edge of the 4 oz satin weave cloth over the MDO here, then 2 inch and 3 inch 8 oz on the chines,
all laid up wet on wet. Bottom done - ready to roll over!
|
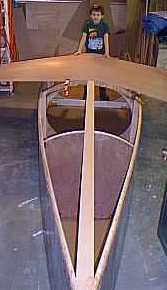
April 8: Rolled her right side up.
Joe helps test bend a deck panel....
(1/4 inch Luan looks like it will take the deck camber OK)
|

April 4: Bottom panel ready for glue.
Working by myself I came up with this rig to (hopefully) gracefully pivot down and lower
the gooped up panel onto the sides. However, thankfully, and at the very moment
I was poised to lower the panel there was a knock on the shop door, and neighbor and boatbuilder
Harry James donned gloves for this step.
|
April 5: Bottom panels all glued on and splices glassed.
Prime coat of epoxy on MDO - the paper is amazingly thirsty!!
Wet spots are where it has not completely soaked in yet - it looks
and appears dry to the touch after about 10 min, though the epoxy has
not kicked off, just soaked in.
Need to be careful about glue starved joints with this stuff!
|
April 3: Cut new bottom out of 2 sided MDO, fir this time instead of yellow poplar.
Looks much better and should finish more quickly.
|
2-sided MDO trimmed
- laminate trimmer and 1/2 inch roundover bit made very short work of it,
and gave very fair lines in about 20 min start to finish! Light athwarthships
bands are hollowed out areas where I ground thru the brown MDO paper for Payson butt splices. Topside edge of forward
butt will be a doubled up section of bottom up forward, aft 2 butts land on
widened frames.
|
March 30, 1999: Forward 17 feet of bottom panels cut to shape out of 1 sided MDO.
Neighbor and retired forester Ken Mitchell comments with some surprise that
they are making plywood out of yellow poplar. Hmmmm....
|
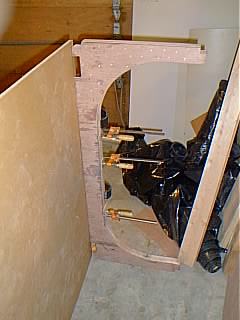
Bottom butts modified to land on widened bulkhead frames,
so 3 bulkheads can just fit on backbone sheet for alignment.
Also I think staggered side/bottom butts are better, especially given piece-wise assembly method.
Routed out under limber holes to accept Payson-style glass cloth butt splice on top
(there would be a bare spot in the butt here otherwise).
This is bulkhead #8, showing backbone sheet extending 1/2 way under frame.
|
Plans call for bottom to be 1/8 inch narrower than sides right at bulkhead #8,
assuming PCB intended for 4 x 8 sheets placed lengthwise for economy, as I am certain he did.
A little filler here in this short area should do fine to fill it out.
Plenty of extra beef in the chine log.
|
March 29 - on her side for rollover! "Backbone" of one midships bottom sheet
tacked on to keep her true during rotation.
Bottom sheet left full size at this point to ease rotation and keep pressure off of exposed and tender chine
|
Bottom up now, mid-section bottom panel trimmed.
|
My construction method is adapted around one "backbone" bottom sheet (here on edge for temporary bulkhead fastenings),
building rightside up thru bulkhead bonding, and building forward 18 feet in one section first
(there's a reason for this, but its a long story...).
Backbone sheet simplifies trueing up and laying out - tack bulkheads on at right angles.
Rest of boat stays true once this section is tacked on.
|
March 23, 1999 - all tacked together for the first time!
|
March 8,1999 precoated parts, ready to assemble |
test fit frame#8 to MDO bottom
|
Log:
Early November 1998: Received Sneakeasy plans from Dynamite Payson. Noted that
Bolger's Plans don't say if measurements are to the inside or outside. 11/13/98 call to Payson, says if there is a measurement shown on a bulkhead then it is for the bulkhead as drawn - look for detail.. I was confused because there IS a note on Bolger's plans for the step-chine version of Sneakeasy as published in "Boats with and Open Mind" that says all measurements are to the outside of the planks.
Noted that the deck radius appears to be at the bending limits of 1/4 inch plywood. May need hot sponge bath? Rudman could not get Ľ inch plywood to bend to those deck radii. He laminated up 2 sheets of 1/8 doorskin, in place. Carlson's <1/4 inch luan broke on the radius - he just filled it in and it worked out fine.
Next (Early November): Laid out Bulkhead #4 (to see if I could crawl thru easily), cut outside shape, side frames, bottom frames and deck beams (of 3 1/4 in laminates). Made large compass to cut out deck radii, with long anchor legs to tack to bulkhead (radius is longer than bulkhead is deep). Then blew it by cutting thru inside gusset shape on web while trying to simultaneously work on Nancy's dory. Set Sneakeasy aside for awhile till dory further along! (approx 2 hrs.)
November 16, 1998. Sent letter to Phil Bolger and small gratuity, asking him to expand on his brief comment (in Boats with an Open Mind) about adding a forward cockpit to Sneakeasy. Sent a partial copy of plans, hoping he might be able to briefly just make a quick sketch on them.
January 3, 1999 11pm - 1 am. Recut Bulkhead #4 from Ľ luan. Cut new deck beam from 3/4 marply. Rest of frames from 1 by stock. Made medium compass from scrap to cut medium circles (e.g. web i.d. gussets) more easily.
January 4, 1999 10pm - 12 am. Glued up Bulkhead#4 with epoxy. Also fastened with ľ" SiBr ring nails (a tad too long - don't poke through or anything, but 5/8" would be perfect). Probably over-clamped, but better too many than too few. Listened to Art Bell while assembling. Hmmm…
January 9, 1999 3 pm - 4 pm. Picked out 7 sheets of luan with Seth at Valley Lumber and carted home. $104. 10pm-11pm. Sanded and faired bulkhead #4.
January 10, 1999 3pm-4pm. Faired Bulkhead #4 with router, cut sheer clamp, chine log, and limber hole notches. 6pm-midnight. Layed out bulkhead #6 according to blueprint with my protracter with legs. Deck crown line did NOT match up with bulkhead #4 by a longshot! Oh Oh! Spent several hours pondering, measuring, remeasuring. Bulkhead #4 is constructed OK according to plans - rechecked. Discovered error in plans on bulkhead#6. The bulkhead sides are labeled as 1,8,4 (correctly I think), but are drawn on the blueprint as 1,9,1. The crown to top of side plank is drawn AND labeled as 0,7,6 (which would only be correct if the side was indeed 1,9,1). This bulkhead is DRAWN INCORRECTLY - it does not match the side view in the other plan sheet. Bulkhead should be drawn and labelled as 1,8,4 sides, and 0,8,3 top. Top (crown) of deck is supposed to be a straight line according to the plans.
January 11, 1999. Probably spent another 4 hours today checking the plans over. Graphed the deck radii and checked them against the bulkhead layouts in Excel. Fun project dusting off the geometry. Also plotted the sheer and chine lines, smoothing them with a 3rd degree polynomial. Found a couple outliers there that could stand a little adjusting. FINALLY cut out bulkhead #6, once I got confident in my measurements from the plans again. Used Ľ in marine ply (3 even ply's) - leftover from Nancy's boat's bottom.
January 12, 1999. Also checked the bulkhead half-breadths for smoothness. Just visually by graphic examination for smoothness. Not many points, but they look smooth. Glued an extra Ľ in gusset on bulkhead #4 bottom - this will take some abuse from crawling thru etc., and the luan may not hold up. (2 hrs)
January 13 1999. Laid out and cut bulkhead #2 from Ľ luan. Left solid - this may end up as a watertight bulkhead for nose wheel. Also may laminate Ľ double up. Also would mean I may have to have frames/beams face aft, so need to allow extra for side and bottom bevels if so. Seth comes up with idea to graft trailer hitch to keel extension. I like this because it is a completely undo-able experiment if it doesn't work. Will laminate up forward part (or all, for extra strength!) of keel ( 2 hrs)
January 14, 1999. In morning before school Joe and I set up bulkheads in our hall (a little narrow, but close to max beam) to get a feel for the boat dimensions. He loved crawling thru the bulkhead openings. Late PM late out bulkhead#6 center hole cuts. Started, but small skillsaw was having trouble cutting radius, even on minimal bite. Wasn't working well so stopped. May try sabersaw tomorrow and see how bad the chatter is. (1 hr)
January 15, 1999 Cut out inside of bulkhead#6 with sabersaw. Cut the Ľ" MP with very little chatter, quickly, and with surprisingly little tearing. Lines are sufficiently smooth for this purpose (but skillsaw better on outside. Don't have a wide enough ľ" MP for deck beam, so will have to cogitate.
January 16, 1999. Cut out 1 layer of deck beam from Ľ" MP. Will Laminate. Worked on scantling spreadsheet. 1 hour total. Anxious to get cardboard bow template setup for Joe to play in.
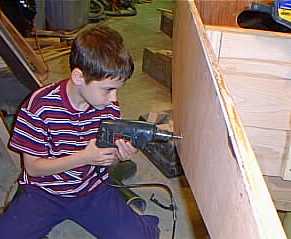
January 17, 1999. Cut out other 2 layers of deck beam from Ľ" MP. Middle layer in 2 pieces, sawn frame style, trying to use up all the rapidly accumulating plywood scraps! Clamped it all together and set up in the hall for Joe to play in in the morning, "decking" over between bulkheads 4 and 6 with posterboard. Also glued the keel on Joe's double paddle canoe tonight - he is great at drilling holes - a good skill for a 7 yr old. He drilled and countersunk almost all holes for the keel. Screwing is still hard for him all the way, but he was good at laying out and starting screws, and helping to spread epoxy. Changed gloves 3 times because he gets it all over his gloves, but by changing frequently he didn't get it on himself at all this time.
January 18, 1999. Glued up Bulkhead # 6. Used ľ" ringnails thruout only a couple clamps. Nailed the Ľ" deck beams (4 layers total) from both sides. Faster than positioning all those clamps, no risk of glue starving, and appear to get adequate squeeze-out every where.
January 19, 1999. Added lower gussets to bulkhead #6. Used Cinnamon for thickener! (Bruce Simonson had tried clove with great olfactory success when sanding) It comes out kind of dark, but nice consistency for thickener. Filled knotholes and cracks thruout, also on #4. Used 3/8 monel staples to laminate gussets - drove with electric stapler, finished set with hammer (& punch for close in). Worked well.
January 20, 1999. Layed out Bulkhead #8 ( cockpit). Decided to go with 2 layers of luan, sandwiching the ľ" stock, cutting extra gussets thruout.
January 21, 1999. Layed out second side of #8, then blew it by rounding the outside edge of the bulkhead! Fetched Nancy's gift of a moaning chair out of the living room, set it in the shop, and used it. Ouch. (1 hour)
January 22, 1999. Worked on Sneakeasy lines drawing on computer (20 min.)
January 24. Letter from Bolger with sketch of front cockpit arrives! Exactly what I wanted.
Late January: Set up completed forward bulkheads in living room, roughed out cardboard sides and deck. The kids loved it! Added Bolger's new forward cockpit scaling from his sketch to see how it looked full size. Windshield would be hard to crawl over if one needed to. Joe loved making nests up forward under the decks! Decided to start assembling forward 18 feet of boat, will fit straight in the garage. When next step of divorce is complete and soon-to-be ex's art equipment is finally removed from garage, will set the full boat up diagonally. Extra motivation to get her stuff out of the garage (actually its a much needed motivation psychologically. The whole boat is a bit of a metaphor that way).
February 20, 1999. Lots happened in the last month! Today I first milled out the stem. Bolger show a "1 cut" stem, from a 1 x 2. I wanted to beef up a bit there, since I may be towing. I wanted to keep Bolger's asymmetrical stem, but was unable to in the end, constrained by the cutting depth on my table saw for my beefed up stem. Milled out from a piece of nice VG fir I have been saving. Attached stem to bow section. The plywood but spliced (8 inch) the bow section to the 2 side sections pieces. Milled out and fastened in chine logs, gluing up scarf's in place on flat side on floor. Its getting pretty stiff, but still will bend in OK. Put a glass Payson splice on the outside of the but splice, just for good measure. Nose wheel arrives from Seitech. Damn! They sent the Delrin bearing version instead of the bushing version I'd asked for….the bearings look like big trouble in sand to me.
February 21, 1999. Completed marathon weekend by tacking together the conpleted forward 18.5 feet of the boat for final fit. Spent most of the day finishing out the side panels, adding chine logs, reinforcing panels to sides. Used PL premium polyurethane construction adhesive for the latter task, essentially a panel lamination project, which the PL is designed for and appears to work very well for, spreading with serrated squegee. It handles, (and cleans up!) with the consistency of Dolfinite, with which I am very familiar, having used many gallons over the years on Muir Maid and Endeavour. I like the cleanup ease. Only using it where there are large surface areas, just to be sure. My only concern with it would be what happens after many stress/flex cycles. It does seem to stay just a very little bit flexible, and all test joints have broken at the wood so far. I like its tackiness for assembling parts - not sticky like epoxy or gorilla, but gooey enough to hold pieces together without much slippage during assembly. ˝ inch Monel staples worked great to fasten in chine logs while hand-holding with one hand, stapling with the other. Went back over with some bronze ring nails after tacked together. Routed top of chine logs per Rudholm's note. Boat looks great to see finally together!!.
March 2, 1999. Cut chine log notches and limber holes in bulkhead#8.
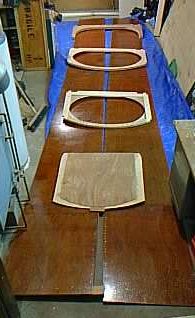
March 3, 1999. Sanded outboard side of sides, and coated with epoxy, thinned with a bit of acetone.
Storing epoxy on the boiler helps to thin it also. (1.5 hrs). 2 more gallons System 3 epoxy arrived today via surface.
Sneakeasy sides have a rich dark mahogany look to it.
Top of Document
Back to Sneakeasy Page
Contact: Fritz Funk (fritz@funk.io)